Monoprice Maker Select Plus 3D printer mods
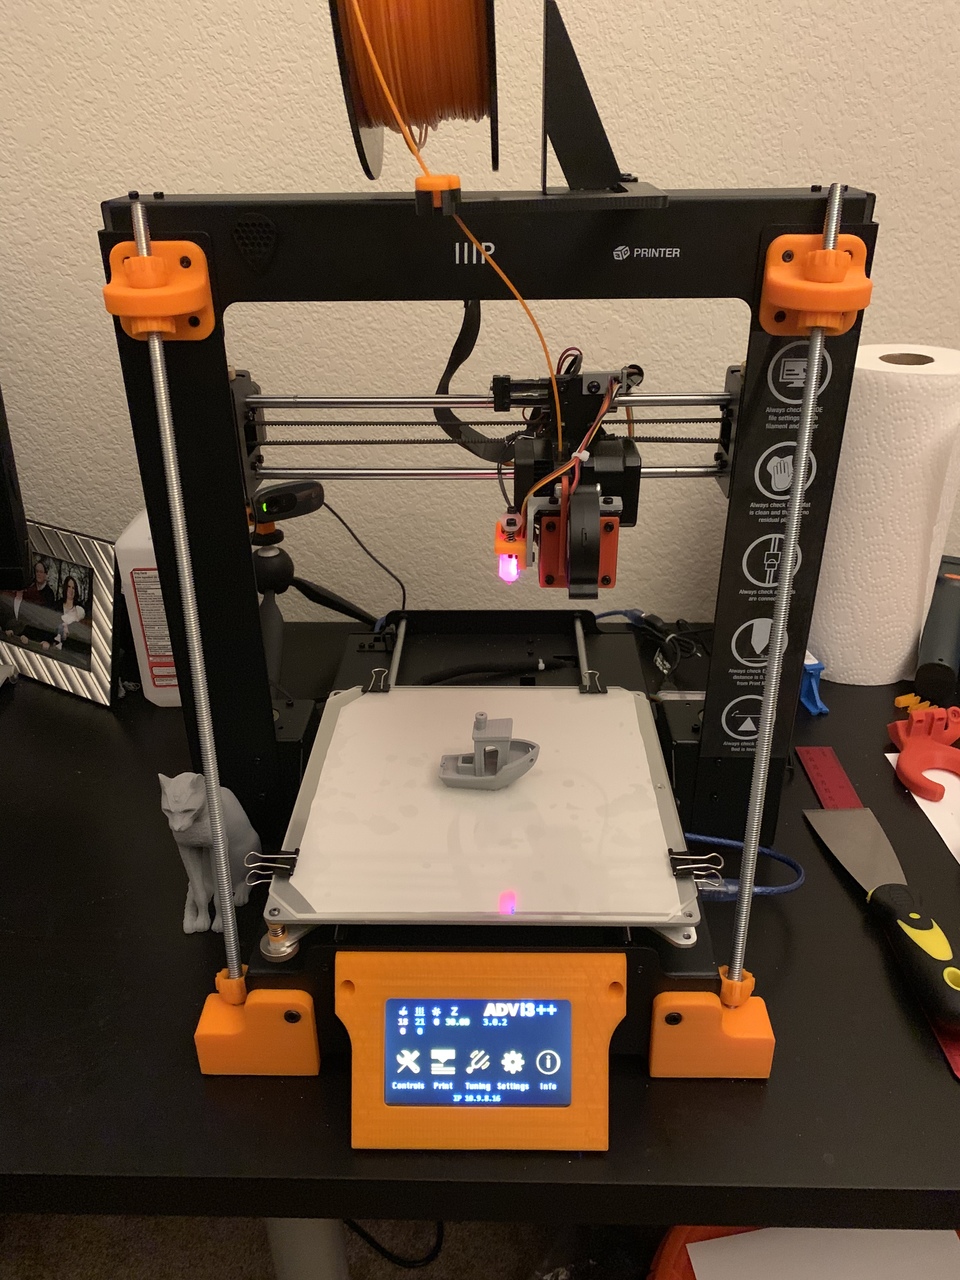
About a month ago I bought a 3D printer, the Monoprice Maker Select Plus. This is a rebrand of the Wanhao Duplicator i3 Plus, and is also rebranded by several other manufacturers, including Aldi supermarkets in Australia. Yes, really.
3D printers run a wide range, from “build the frame yourself and buy a hundred off-the-shelf parts”, to kits which include all the parts but require full assembly, to “spend a few grand, plug it in and turn it on”.
I picked the Monoprice model because it’s nearly fully assembled, requiring about 15 minutes of assembly to attach the two main components together, and it is well reviewed as producing decent prints out of the box. This is an important consideration for a first 3D printer, and I was very lucky to have my first few prints go perfectly, so I had an idea what the process should look like, to compare when things are going wrong.
And they will go wrong. No 3D printer will be completely foolproof, and all require various levels of troubleshooting. For all that I’ve learned in the last month, I feel confident that if I buy another printer, a kit would be easy and a completely-from-scratch build would be possible. (From what I’ve seen, 3D printers are like cats: people who have more than zero usually have more than one. Some even have their houses overrun by them.)
The second important factor in choosing the Monoprice is there is a lot of potential for customization, with a large community of Wanhao i3 owners. And oh boy, have I modded it in the last month. Strictly speaking, none of what I’ve done below is necessary, but this is a hobby, and all of it was fun.
- Printed a filament guide arm just below the spool holder. This was actually my first “mod” and was done with the sample black filament which came with the printer (and I used much of it).
- Added a Z brace, which helps avoid movement of the vertical frame and theoretically reduces the chance of ghosting on prints. It also allows you to minutely adjust the torsion flex of the frame as a whole. This is one of the most impressive cost-to-looks ratio mods, and consisted of a 1 meter threaded rod ($3) split in two, about $3 worth of nuts and bolts, and a large amount of printed parts. The corners also double as a larger base to attach rubber or cork feet.
- Printed a lenth extension to the spool holder arm. The spool holder which comes with the printer isn’t wide enough to fit most common spools, which I think is one of the few outright flaws of the i3 Plus (albeit a small and easily corrected flaw).
- Printed an LCD extension panel, which tilts the viewing angle up slightly, and allows access to the LCD’s internal diagnostic MicroSD card (see below).
- Replaced the printer’s firmware with ADVi3++. The original firmware was decently capable, but was based on an older version of Marlin. ADVi3++ is based on the latest version, has extra features such as guides for filament length adjustment, and quality of life improvements such as temperature readings on the main menu. This involved upgrading the firmware on the internal main board itself via USB, as well as upgrading the LCD’s firmware via a MicroSD slot on the side of the LCD. (Yes, the LCD has its own microcontroller.)
-
- Update (2019-06-16): I am no longer recommending ADVi3++ as, while the source code is still open source, the author is now charging for the firmware binaries as well as much of the documentation, including how to compile the source. The author is within his rights to do this, but I disagree with it.
- Replaced the cold block fan (which prevents the molten filament in the hot end from flowing back up and jamming) with a direct replacement. The original one started making a loud noise after a few weeks of use, and is a known problem. Thankfully direct replacements are a few dollars on Amazon.
- Replaced the 40mm part cooling fan with a 50mm blower fan. There are many more efficient part cooler mods such as the DiiiCooler or the CiiiCooler which evenly distribute the air around the nozzle, but have tradeoffs such as visibility and clearance issues. I’ve found simply printing an adapter shroud for the front slot works fine for my needs.
- Replaced the original 4-point corner bed leveling system with a 3-point bed level (two on the left corners, one on the middle of the right side). This allows for more accurate adjustment, since technically it’s impossible to adjust a flat plane using four points (you end up warping it into a 3-dimensional object).
- Added BLTouch bed leveling. This consists of a probe mounted as close to the nozzle as possible. The probe can sense with a high level of precision when it touches the surface, and reports this data at various parts of the bed to the firmware, which can correct for different heights on the bed’s plane. (It’s still also a good idea to start with a decent attempt at manual leveling.)
- Replaced the BuildTak-like surface with a glass print surface, with a large (but incredibly thin) thermal pad between the heated plate and the glass.
- Added four binder clips to the edges to prevent the glass from separating from the plate. Not the most exciting mod, but it’s worth pointing out since you need to account for them when doing low-height print head travels. I’ve got some thinner clips ordered, but they haven’t arrived yet.
- Replaced the thin Y carriage with an all-aluminum replacement, allowing for a more stable Y axis.
- Did some of my own firmware mods based on ADVi3++. In particular, the BLTouch sensor’s hardware development is moving fast and the version I received (v3) wasn’t compatible with the support in ADVi3++ (v2), so I backported v3 support from the Marlin development branch.
- Set up a Raspberry Pi with OctoPrint, a USB printer manager. You could just transfer GCODE to an SD card and print it directly from the printer, but OctoPrint gives you more convenience and flexibility. After I slice an object, I can tell Cura to send the GCODE directly to OctoPrint which starts the print. And I’ve got a webcam pointed at the print bed, which OctoPrint shows and lets me monitor the print when I’m away from it, and it also captures a per-layer timelapse of the print.
- The printer’s main board is a variation of a reference Arduino platform, and an annoying side effect is it can be powered from the USB port. I don’t want this, since the USB host is a Raspberry Pi which has its own limited power to deal with, and also means that when I turn off the printer via the back power switch, the main board and LCD remain on (but have no control over the motors, heaters, etc). I solved this by taking a USB cable, stripping off the sheath in the middle and cutting the red wire. This turns it into a “data only” USB cable, so the printer turns off completely when the power switch is turned off. Interestingly, I have yet to find a commercially sold “data only” cable, though obviously the opposite “charging only” is common.