The printer formerly known as Ender
Five years ago, I wrote about the 3D printer I had recently bought, a Monoprice Maker Select Plus (Wanhao Duplicator i3 Plus), and the various mods I had done to it. I had discovered that when it comes to 3D printing, for me the journey was much more fun than the destination, and while I often use 3D printers for “practical” purposes, hacking on the printer itself is the most fun.
In that post, I said:
3D printers are like cats: people who have more than zero usually have more than one. Some even have their houses overrun by them.
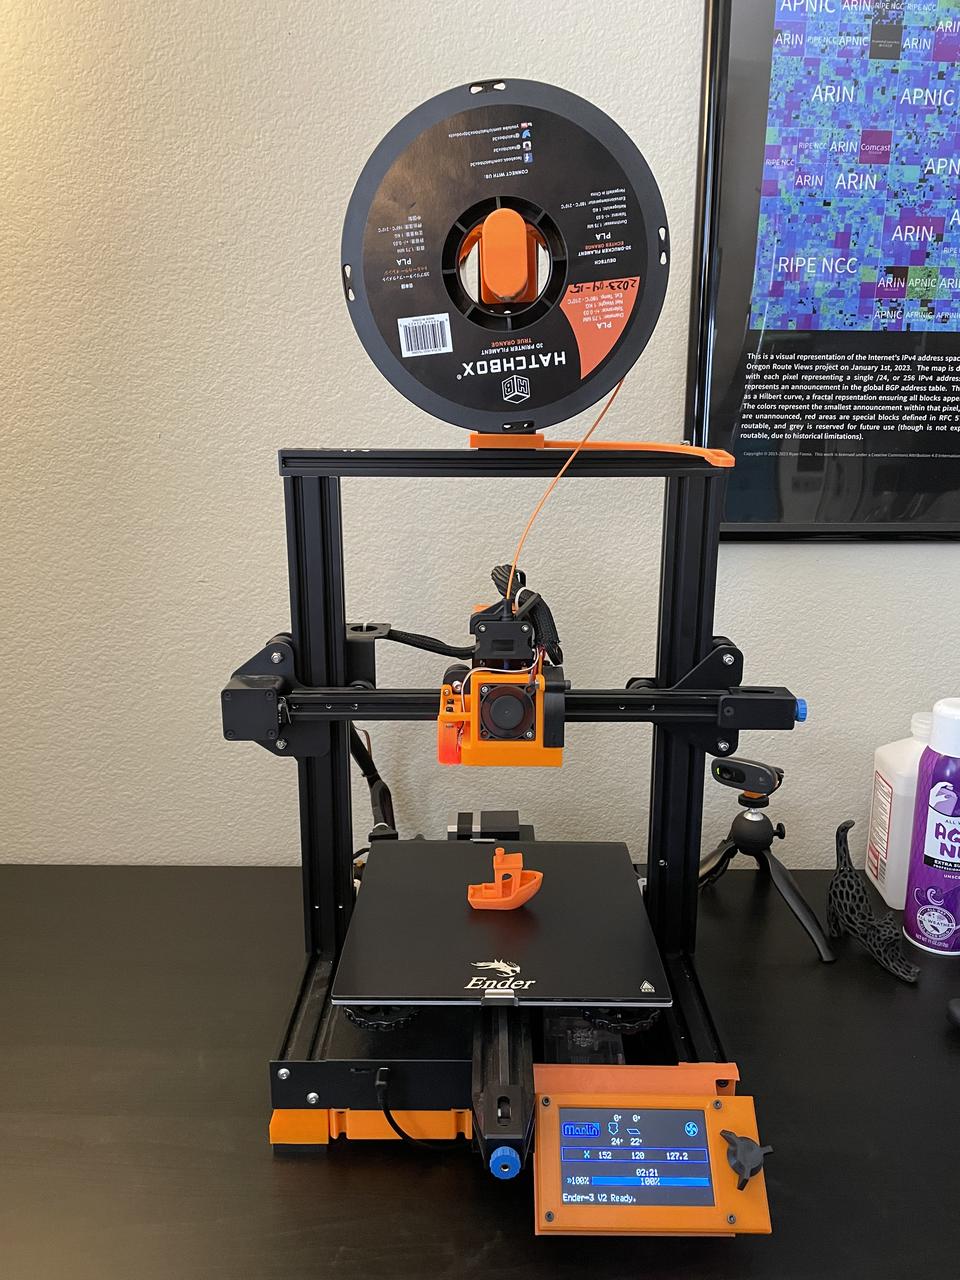
Two years after that, I bought another printer, a Creality Ender 3 V2. In the same spirit, it’s a very hackable printer, to the extent that I’m not even sure I should call it an Ender 3 anymore. Most of the components have been modified or replaced in the 3 years I’ve had it, with the latest being a direct extrusion conversion. Everything orange you see in that picture is a 3D printed mod.
Admittedly, a lot of it is change for change sake, but a lot is also for performance, quality and reliability reasons. For a hobbyist printer, it works amazingly, and produces nearly perfect Benchys, though of course the speed isn’t as great as a hyper-modern printer like a Bambu.
While I am perpetually on the edge of building a full kit from scratch like a Voron, my time with the Ender 3 V2 has been very enjoyable. Below is an account of all the changes I’ve made to the printer since I bought it 3 years ago.
The newest addition (within the last few weeks) is a direct drive extruder, the Creality Sprite SE. (Not to be confused with the dozen other variants of the Creality Sprite. Creality has a tendency to do that with everything it makes.) This replaced the Bowden tube system; the only other accessory to note is a simple cable routing channel I designed so the cable bundle didn’t get pinched on the sides when moving around.
The hotend is a Micro-Swiss all-metal hotend, and the fan assembly is a complete replacement, supporting a better hotend cooling fan and part cooling fan. A BLTouch automatic bed leveler is also added. (That link now goes to Creality’s CRTouch alternative, but when I bought it, it was a genuine Antclabs BLTouch, back when they were partnering directly with Creality.)
The LCD panel has been modified, changing it from portrait on the side to landscape in front, with a new control knob. The UI has changed from CrealityUI to MarlinUI, and because of this (and the many other mods), I’m running standard Marlin, with my own custom configuration.
The Z axis has been upgraded to dual screw with dual motors, though they are both controlled by the same stepper driver, so it’s more about stability than independent calibration. In addition, the Z axis shaft couplers have been upgraded to reduce horizontal shaft movement.
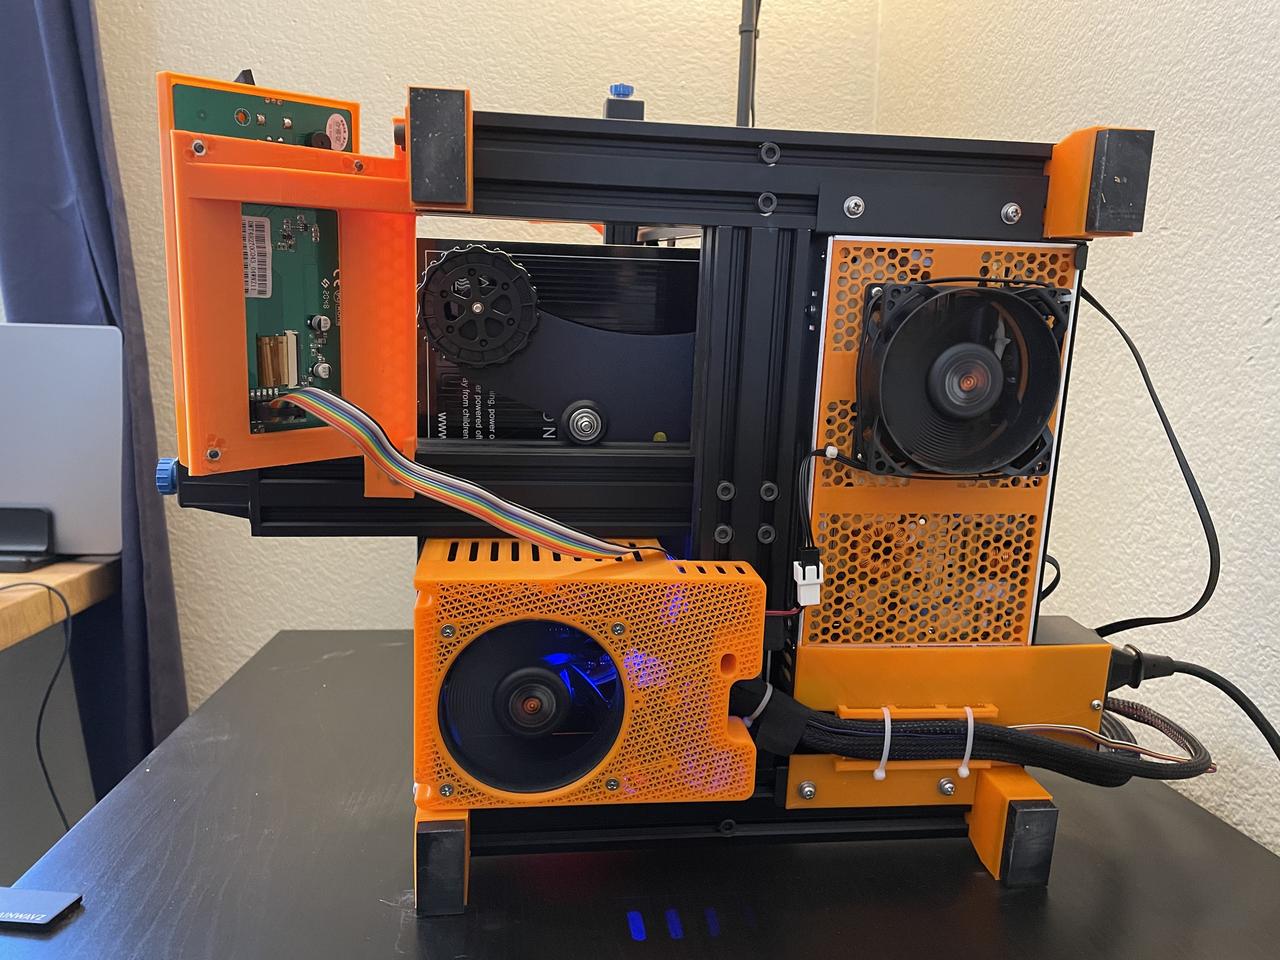 The entire underside has been pretty extensively reworked, as the stock Ender 3 V2 was pretty starved for airflow. The covers for the mainboard and PSU area have been replaced with prints which allow for quiet 80mm fans, but as they are 12v fans and the printer is a 24v system, an LM2596 buck converter is needed. To support all of this, the printer needs to be raised up a few inches, so these feet are used (which even incorporate the original printer’s rubber feet).
Last year, I was having issues with Y axis shifting. The problem ultimately ended up being the motor itself was losing steps, so I needed to replace the motor and pulley (since the factory motor includes the pulley permanently attached). However, there was also the the concern it may have been the stepper driver on the mainboard itself, and the drivers are not modular. While this ended up not being the case, I ended up buying and installing a replacement V4.2.7 mainboard, which is a direct replacement for the stock V4.2.2 board, with some very minor improvements.
Not much has been done to the bed itself, with the only addition being upgraded springs, though the BLTouch makes manual bed leveling unnecessary (you’re good if you can keep it within 0.5mm of level or so). However, I did simply remove the rear left screw from the bed, making it a 3-point system, which helps reduce flex within the bed itself.
The filament spool holder has been upgraded to add skateboard bearings. And finally, a simple filament feed arm, though this isn’t needed as much today, since I replaced the Bowden system with direct extrusion.