Building a RetroPie game console
 Early in 2017, I did a three part series, “Re-Buying My Childhood”, where I tracked down and re-purchased the various Nintendo consoles and games I owned as a kid. It was a fun process, but since then, all the consoles (except the Game Boy Color) and games have sat in a box.
See, the problem with collecting a set of 30+ year old hardware is at the end of the day, you’re left with 30+ year old hardware. The NES and SNES don’t even work with my living room’s 65” 4K LCD TV. (My working theory is the TV expects a proper 480i composite signal, while Nintendo consoles of the time would output a slightly standard-breaking 240p which is to be interpreted as 480i.)
Even if they did work, I don’t really have room in my living room’s entertainment center. And I don’t have a “man cave” where I can set up a proper CRT TV to play them on. And let’s face it, I (and the world) have gotten lazy over the last 30 years or so. Get up from the couch and physically switch out a bulky cartridge to play a single game?
So this year, I decided to build an emulation box for the living room. As an aside, I like to take things apart, figure out how they work, break them, re-implement them, make them do new things, etc. This plays into the story of my last emulation box: years ago, I built an i3 system into a small Shuttle case. I installed Ubuntu, got emulation software working, and wrote my own custom front-end launcher system.
I ended up rarely using it. The problem was there was always something wrong or quirky with it. It wouldn’t be on when I wanted to play and would require a full boot and log-in cycle (digging out a USB keyboard to attach). The wired USB control pad wouldn’t be attached and might be in a drawer somewhere. The front-end software I wrote might not work right.
No, if I wanted to do a new emulation box, I would need to suppress my desire to tinker with every internal aspect of the box and build something which is self-contained and just works. A simple RetroPie setup. Well, that was the theory, anyway. Ironically, this post has been delayed by months because I’ve been continually switching out and modifying things, but the important difference is that at any point during the last few months, the system has always been in a “just works” state. I could pick up the controller and be within 30 seconds of gameplay.
The hardware
I didn’t want to build a mini x86 system, and RetroPie is primarily targeted at the Raspberry Pi. When I first built the system, it was a Raspberry Pi 3, but shortly after, the 3 B+ (slightly better CPU and Wifi) was released and I switched to that. Either would be fine, but while technically RetroPie is supported all the way down to the original Raspberry Pi models, I wouldn’t recommend anything older than a 3 due to the emulation’s CPU demands.
Good power is an absolute requirement. When I originally built the system, I used the first random micro-USB cable I found lying around, plugged into a shared USB power supply. But when playing games, I would get slowdowns combined with a yellow lightning bolt in the corner of the screen. This meant the Raspberry Pi was not able to get a continual clean 5v supply, and was throttling itself as a result. I replaced the USB cable with a better quality one, and while it helped a bit, the slowdowns were still present. I finally swapped it out for a dedicated 2.5A micro-USB power supply from CanaKit, and the problems went away completely. In fact, if you’re starting from scratch, I’d recommend buying a complete kit from CanaKit which includes a Raspberry Pi, good power supply, case and a few other accessories.
A decent heatsink is also needed. The standard square ones found everywhere will minimally do the job, but I recommend a full-coverage heatsink as large as possible. I’ve currently got a very nice heatsink from Kintaro which covers almost the entire board. The problem is, as of this writing, the model I have (for the 3 B+) doesn’t appear to be for sale, just the 2 / 3 B model.
A fan may also be nice to have, but I’ve found if the heatsink is good enough, it’s not strictly needed.
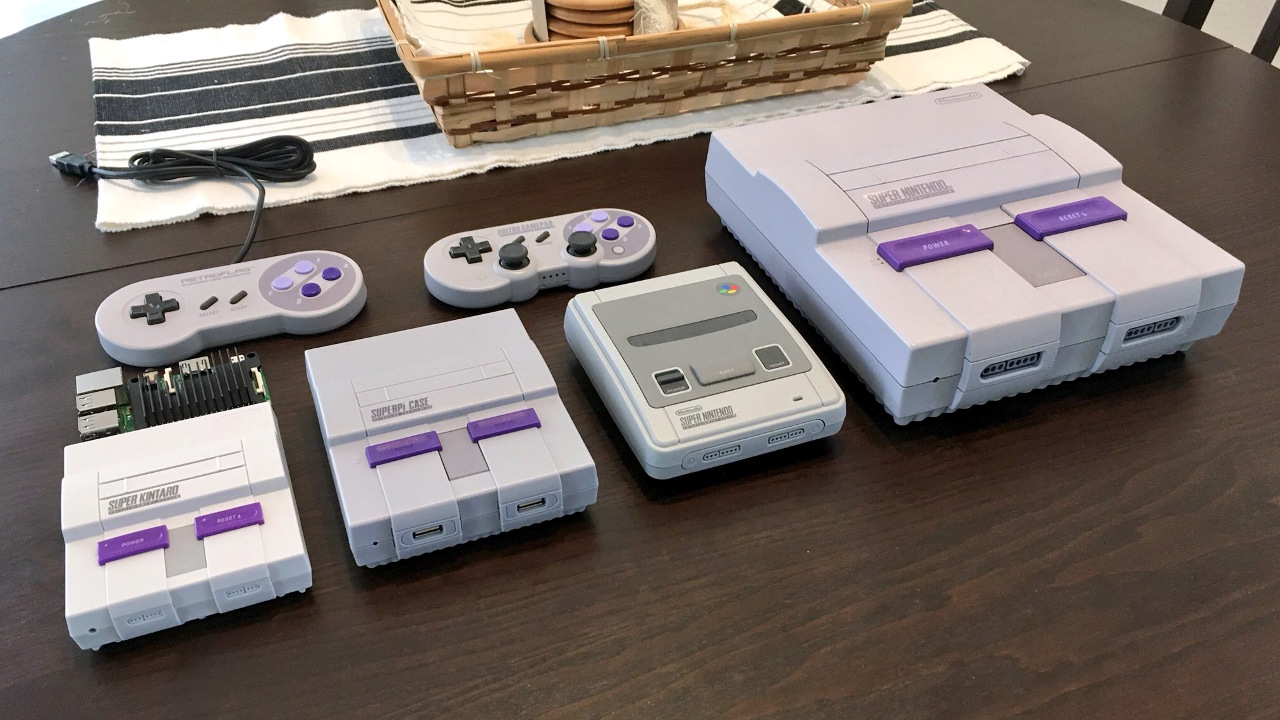
From left: Kintaro Super Kuma (RPi), Retroflag SUPERPi (RPi), SNES Classic Mini (EU version), original SNES
The case
Technically, any case will do – or even no case; just chuck the board next to the TV. But let’s be honest, I wanted something nice and retro-looking for the living room. I got the Kintaro Super Kuma, an SNES lookalike Raspberry Pi case. This thing was tiny (and therefore adorable), taking up little more than the footprint of the Raspberry Pi itself and about half the size of even the SNES Classic Edition, while still looking like an authentic SNES. There were a few small cosmetic issues, such as the top buttons were decorative only and the plastic colors were a bit lighter than authentic, but I was fine with that until something better came along…
… Which it did, a few months later with the release of the Retroflag SUPERPi case. The SUPERPi is larger than the Kintaro case, is dimensionally identical to the SNES Classic Edition, and the colors are spot on. There’s also a Super Famicom-styled case if you prefer that instead, but I find the SNES styling to be great.
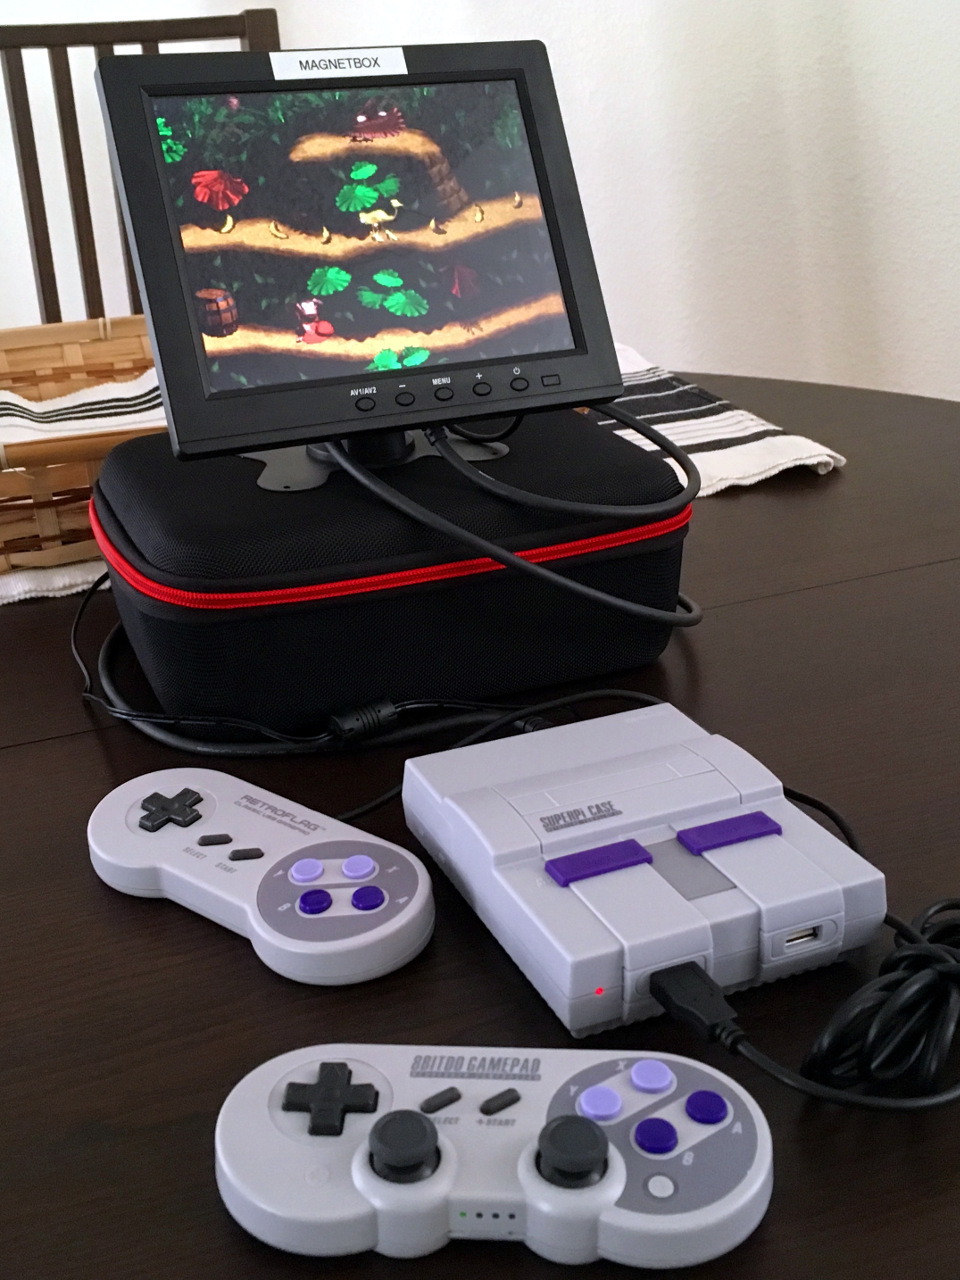
The power and reset buttons are functional, attaching to GPIO pins on the Raspberry Pi. Even the eject button is functional, popping up the cartridge slot to reveal a small space which can be used to store MicroSD cards. Finally, the front controller port area features two USB ports for attaching wired controllers, while leaving the other two Raspberry Pi USB ports accessible on the side of the case. The case even comes with an SNES-style USB controller, which is great quality as far as SNES controller clones go.
I wanted to retain the excellent Kintaro full-spread heatsink, but there were some compatibility issues with its size which required a bit of light surgery. Ultimately I removed the cartridge slot storage and forced close the slot cover, making the eject button nonfunctional, but I’m fine with that as a trade-off for a better heatsink.
The controller
I actually wrote an entire post just on controllers; please take a look if you want all the details. But in general, you can use nearly any controller with RetroPie, wired or wireless, if you have enough time and/or money for the more esoteric combinations. But nearly any wired USB controller should work out of the box with RetroPie.
My current favorite is the 8Bitdo SN30 Pro, a Bluetooth controller which feels nearly identical to the original SNES controller, but has the addition of dual analog sticks and extra trigger buttons. It’s a little uncomfortable for longer play sessions (as was the original SNES controller), so I am looking forward to the SN30 Pro+ later in 2018, which is functionally identical to the SN30 Pro but has ergonomic wing grips.
The software
This is the part I’ve fiddled the least with, intentionally. I just want it to work reasonably well. I downloaded RetroPie, wrote it to a MicroSD card, and ran it. The only reason confusion came from the initial startup: it booted up to a RetroPie configuration menu, and that was it. I sort of expected a list of emulators, or some sample open source games, or similar. Turns out the emulated systems will automatically appear once you upload ROMs to it, something easily done with scp.
Obviously I’m not going to get into the legal or moral aspects of ROMs, but I will say I’ve got ROMs of the cartridges I’ve purchased, as detailed in a previous post. I even headed to a local retro game shop one weekend (yes, we have a local retro game shop), picked up a few PS1 games and ripped them.
(Is it a problem that I’ve ripped CDs for a system I’ve never owned? Technically yes, since the PS1 emulator requires a BIOS ripped from original hardware. But hey, Sony sued Lik-Sang out of existence, so screw them. Yes, I’m still bitter.)
Overall, emulator performance and compatibility is excellent with nearly any system of PS1 era or older, with one exception. NES, SNES, Game Boy and PS1 games all seem to work great. The one major exception is the Nintendo 64. In general, don’t bother on the Raspberry Pi, or use a modern desktop PC if N64 emulation is desired. RetroPie has an entire page of half-baked tips and tricks to get acceptable N64 speed on a case-by-case basis, but even its own docs discourage you from trying. The Raspberry Pi just isn’t powerful enough for the N64’s quirky architecture.
In general, I’ve mostly left the RetroPie software itself alone, but there are a few tweaks I’ve made. I’ve forced the resolution to 1280x720 (on my massive 4K TV) and enabled integer scaling for better performance, with the idea that the emulator should spend as little effort as possible on actually outputting the graphs, and let the TV handle the rest. I also needed to install handler software for the case’s power/reset GPIO buttons, even though I don’t ever turn off the system itself.
The blockiness of the graphics on a 65” TV are noticeable, so I spent a day playing with various graphics shaders, but eventually settled on the simple built-in bilinear filter. It softens things but doesn’t do anything else. People will argue endlessly about scanlines, but my rose-tinted glasses don’t remember scanlines being part of the authentic CRT experience growing up, so they don’t look “right” to me.
Overall, I think I’ve accomplished my goal. A simple retro system which is fun and easy to pick up and play.