
| Build a Fault-Tollerant Terabyte Storage Server for Under $1.98 |
Table of Contents
In late 2003, I read an article off Slashdot called Building A Budget Storage Server/Workstation. The original idea was interesting, though execution was gamer-specific (IE, misguided). They decided that RAID wasn't needed, ATA disks were reliable, and the proper keyboard and video card are essential to a storage server.
At the same time, I had been toying with ripping my 250+ DVD collection to DivX format and creating a media center to view them. That, combined with the 2.9 million various ISO images I seem to have lying around, meant I had a new goal in life: build a large, fault tollerant storage server with a penny pincher budget. The project began in December 2003 and was completed in April 2004.
The topic of this article, summed up in one word, is "RAID". You need RAID. Over the years, the general population has been demanding higher storage capabilities at lower prices. And hard drive manufacturers have been meeting those demands, sacrificing quality in the process. Heck, the warranty on your new hard drive will expire by the time you drive home from Best Buy; how long do you think the drive itself will actually last?
Note that this article will probably become obsolete relatively soon. Amusingly, while searching for reference material, I found Build a 1.5 Terabyte SAN for less than $35,000. This article describes how to build a 1.2TB SAN for about $1,600.
| The Original
Plan or, Let's Fry Our PCI Bus! |
I had built several budget servers in the past that used software RAID1 for fault tollerance. The concept is easy: Take 2 equal ATA or SATA drives, throw them in a box, partition each drive equally with the fd (Linux raid autodetect) partition flag, create a raidtab file in Linux with the right RAID1 magic, type mkraid /dev/md0, and you have a fault tollerant partition called /dev/md0. Easy setup, acceptable performance, low price tag. So why not extend the idea? Take 6 200GB hard drives, span them across 3 consumer PCI ATA cards, and do RAID5 between them. Easy 1.0TB, right?
Wrong. Turns out the PCI bus cannot handle the amount of traffic that software RAID5 was using when doing initial reconstruction. I could see the drives, I set up my raidtab file, but about 5 minutes after I ran mkraid on the array, I would start getting DMA timeouts across all ATA channels.
| The Alternatives or, What Alternatives? |
It was pretty clear at that point that software RAID by itself would not be sufficient for setting up a terabyte array. A pure hardware RAID controller would be needed, and one with at least 6 channels. The only controller I could find that would suit me was the 3ware Escalade 7506-8, but that has a hefty $400 price tag. Also, 3ware cards are pretty picky about hardware compatiblity, so I wasn't even sure it would work with my existing motherboard. So the storage server remained in storage, uncompleted.
In April 2004, I was walking around Fry's and found the HighPoint RocketRAID 454. It looked like a normal 4-port ATA RAID controller, but with one difference: it boasted the fact that you could do RAID across 2 devices per channel. Normally this would be a stupid feature. Under normal circumstances, NEVER connect 2 drives to one channel if you intend to do RAID. Why? There is just as good of a chance that the channel itself dies than a single drive failing. Say you have 4 hard drives across 2 channels and want to do RAID5. RAID5 uses only one set of parity, so if you lose a channel, you lose 2 drives, which leaves you with a relatively expensive paperweight rather than a functioning array.
However, I had a different idea: RAID50. In my RAID50 setup, you would need 8 200GB drives and the aforementioned HighPoint RAID card. Create 2 RAID5 arrays in the RAID controller's BIOS; the first using the master drive in each of the 4 channels, and the second using the slave. This leaves you with 2 600GB arrays. Then in Linux, combine them together using software RAID0, and you are left with a single 1.2TB array. Of course the disadvantages are that I have to buy 2 more 200GB drives, and I am now "wasting" 2 drives instead of one. But the advantage is my array is now 1.2TB instead of 1.0TB, and if a channel dies, the array is still intact, albeit with both low-level RAID5 arrays in degraded mode.
It should be noted that you can do the opposite, IE RAID05. In RAID05, you would create 4 RAID0 arrays on the controller, each using both the master and slave drives on each channel. Then, set up software RAID5 using the 4 arrays. RAID50 was chosen over RAID05 because doing RAID5 in software is less efficient than RAID0.
Later I will show you how to actually set up your new array. But first...
| The Hardware or, A Premium Keyboard is Essential to Your Storage Array |
Note that I began to build my array using a different set of assumptions than what I'm doing now. Below I will point out what I bought and what I think you should buy, if the two are different. All prices were taken from newegg.com on April 6, 2004.
Case: One word: Antec. We need the ability to hold 10 drives (8 200GB drives, a boot drive, and a CDROM drive) while allowing for sufficient airflow. I bought the Antec Performance Plus II SX1040BII (closest equivalent on newegg.com is the Antec PlusView1000AMG) and am very pleased. This case has 2 sets of 3 3.5" drive bays (total 6) and 4 5.25" bays. The case is lockable to keep prying hands away, and cooling locations are ample (1 in front of each HDD sled, one on the bottom front, and two on the back). A power supply is NOT included, which is good because we want to get one separately. Note that you will need 3 sets of 3.5" to 5.25" adapters for the 3 hard drives that will be in 5.25" bays. Hard drive manufacturers no longer provide these free, and newegg.com doesn't seem to sell them, but they should run less than $3 each set (assuming you don't have them lying around already). $69
Cooling: While our Antec case has enough locations to attach fans, it only comes supplied with 2, which leaves us 3 80mm fans short. Personally, I like the Delta 80CFM fans, except 1) they are too tall for the Antec snap-in fan mounts, 2) they will make you deaf, 3) they're expensive, and 4) they're a bit overkill. (Off-topic, if you happen to buy a Delta fan, be sure to buy a fan grill! In the race between a finger and a Delta fan, the fan wins. (Thankfully I don't know this first-hand.)) Anyways, anything above 35CFM should be sufficient here. In this case, the cheapest I found was the Vantec SP8025UV-BL, 39CFM, $4 each. $12
PSU: I have a 400w power supply in my array, and frankly that scares me. I'm not sure how all of those drives are operating with only 400w of power, but somehow they are. The PSU will be the first thing I replace, with a 500w. The Codegen PS-500 is cheap, but gets decent reviews from what I have seen. $43
Motherboard: Everybody has their favorites here, but the de-facto cheapest solution is an Athlon solution, so we'll be starting there. I have a Tyan S2495ANRS, which is rather nifty. Onboard audio and LAN, 4 ATA and 2 SATA channels, and 3 DDR slots. I chose this board because of the 4 onboard ATA channels for the aforementioned failed project. But it's a little overkill (and expensive) for our needs. Also, Tyan seems to have discontinued it. So what do we need? At a minimum: Athlon support, 266mhz FSB (which puts us up to a 2400+ processor), 2 ATA channels (for boot drive and CDROM), and onboard LAN and video. Pretty standard stuff. The cheapest I found was the PC Chips M825LU. Everything we need plus cheap audio. Woo! $38
Processor: We want powerful, but a 3.2ghz processor isn't exactly needed for serving files, I have an AMD AthlonXP 2400+ which was pulled from another machine, but instead I would recommend the 2000+. It's the cheapest 266mhz FSB processor, which should match up nicely with the motherboard. $52
Memory: I have 2x512MB Kingston HyperX PC2700 memory, which I got free from a vendor at my previous employer. This is definitely overkill. For memory, we want quality, but still affordable. I recommend a single standard Kingston 512MB PC2100 stick. You could go with 1GB if you wanted to (a large ramdisk would be nice to place an ISO on before burning, for example), but we're buidling a budget storage server, remember? Eek, memory is expensive this week. Maybe it'll go down again next week. $97
RAID controller: HighPoint RocketRAID 454. We've gone into too much detail above to re-iterate. $87
Hard Drives: Western Digital 200GB 8MB cache 7200RPM drives are currently the best balance between storage size and price (with storage size being a larger factor, but price still being considered). Note that the link above is to newegg.com, which has the 2MB cache OEM for $140, limit 5. I recommend heading down to Sam's Club; they have a WD 200GB 7200RPM 8MB cache box package for $140, no limit. We want 8. $1,120
Boot Drive: I threw in a WD 13GB drive that was lying around, and I recommend that you do the same. For sake of argument, say you have no extra hard drives; here's a WD 40GB, the cheapest I found on newegg.com. $57
CDROM Drive: Again, found a CDROM, threw it in. Theoretically you don't even need one if you can install your OS from the network. Or you could get a CDRW if you plan on burning CDs from the array. Anyways, here's a cheap one. $15
Total Damage: $1,590. Of course, this can vary depending on how you want to customize your array.
| Installing the
OS or, Copius Amounts of Waiting |
Mash everything into the case, but don't install the actual RAID controller yet. We want to install the OS first, and don't want the possibility of the OS to recognize the individual array disks as non-RAID devices.
You have several choices available for an OS: Windows, Linux and FreeBSD, which are the OS's supported by the RAID controller. I'm not sure if Windows has the ability to do software RAID0 (which we need), but you're welcome to try. FreeBSD is an option with vinum. Nothing wrong there, but I'll be detailing how to set this up under Linux. Now, what distro? Of course you're welcome to use whatever distro you're most comfortable with, but I like the "set it and forget it" approach, so I wanted Red Hat Enterprise Linux 3. Of course RHEL3 is too expensive for our budget, so I chose CentOS-3.1, a RHEL3 clone with a better pricetag (IE, $0). Details of what to install depend on your needs. For example, I have Windows machines on my network, so Samba is a good addition. After the OS is installed, grab any need updates, then go here and download the HighPoint "Linux Source Code" (which is actually just a wrapper around a binary object, version 2.1 as of this writing). Follow the instructions in the readme file to compile the driver.
Before you shut down the system, ask yourself this: are you using a "vendor-specified" kernel, or did you roll your own? If you didn't roll your own, most likely the generic non-RAID HPT374 driver is compiled into the kernel, which will detect each drive individually. Obviously we don't want this. Put this at the end of the "kernel" line in /boot/grub/grub.conf for your kernel:
hde=noprobe hdf=noprobe hdg=noprobe hdh=noprobe hdi=noprobe hdj=noprobe hdk=noprobe hdl=noprobe
After the OS has been installed and modified as needed, turn off the machine, insert the RAID card and boot back up. When you first power on, there should be a beep that is not coming from the motherboard. This is a speaker on the RAID controller itself. It should start screaming at you if a drive in the array fails. Moving along... When the HighPoint BIOS screen comes up, hit Ctrl-H and a menu will come up. You will want to create a new logical RAID5 drive. Select the master drives from each channel. The default chunk size of 64k should be sufficient. Then do a "Zero Create" which will prep the drives for RAID5 use. Warning: this will take a LONG time. Go grab a bite to eat.
Then see a movie. Then go out for drinks. For me, it was about 5 hours per array. Once the first array is completed, create a new one for the slave drives in each channel. And then go to bed. When you get up, you should have 2 new 600GB RAID5 arrays. Boot into Linux, then load the HighPoint driver you compiled earlier. Check dmesg. It should detect the controller, see the arrays, and create /dev/sda and /dev/sdb.
| Partitioning
the Drives and Building RAID0 or, I'm Running out of Witty Things to Say Here |
Do an fdisk /dev/sda. Create a partition the entire size of the "disk". When the partition is created, hit t and enter partition type fd (Linux raid autodetect). Hit w to save and exit. Repeat the process for /dev/sdb. You should now be partitioned correctly. The process should look something like this (unimportant lines removed to conserve space):
# fdisk /dev/sda
Command (m for help): n
Command action
   e   extended
   p   primary partition (1-4)
p
Partition number (1-4): 1
First cylinder (1-72963, default 1): <enter>
Using default value 1
Last cylinder or +size or +sizeM or +sizeK (1-72963, default 72963): <enter>
Using default value 72963

Command (m for help): t
Selected partition 1
Hex code (type L to list codes): fd
Changed system type of partition 1 to fd (Linux raid autodetect)

Command (m for help): p

Disk /dev/sda: 600.1 GB, 600148869120 bytes
255 heads, 63 sectors/track, 72963 cylinders
Units = cylinders of 16065 * 512 = 8225280 bytes

   Device Boot    Start       End    Blocks   Id  System
/dev/sda1             1     72963 586075266   fd  Linux raid autodetect

Command (m for help): w
Syncing disks.
#
To create a RAID0 array, edit /etc/raidtab and enter the following:
raiddev /dev/md0
        raid-level 0
        nr-raid-disks 2
        persistent-superblock 1
        chunk-size 64
        device /dev/sda1
        raid-disk 0
        device /dev/sdb1
        raid-disk 1
Please see the Linux Software-RAID HOWTO for an explanation of the raidtab file. One thing to note is your chunk-size should be the same as the chunk sizes you defined for the RAID5 arrays in the HighPoint BIOS.
To actually create the RAID0 array, execute mkraid /dev/md0. At this point /dev/md0 should immediately be fully usable and you can move on to creating the filesystem. If you plan on using ext3, this was my invocation:
mke2fs -j -m 0 -b 4096 -R stride=16 /dev/md0
To explain: -j is journaling (ext3), -m 0 specifies 0% of the filesystem should be reserved for root use (on a 1.2TB system, the default 5% is 60GB of space!), -b 4096 specifies the block size, and -R stride=16 is a special option for use with RAID systems. In our example, the block size is 4k and the chunk size of the RAID array is 64k, so the stride should be 16 (64 / 4).
# mke2fs -j -m 0 -b 4096 -R stride=16 /dev/md0
mke2fs 1.32 (09-Nov-2002)
Filesystem label=
OS type: Linux
Block size=4096 (log=2)
Fragment size=4096 (log=2)
146522112 inodes, 293037600 blocks
0 blocks (0.00%) reserved for the super user
First data block=0
8943 block groups
32768 blocks per group, 32768 fragments per group
16384 inodes per group
Superblock backups stored on blocks:
        32768, 98304, 163840, 229376, 294912, 819200, 884736, 1605632, 2654208,
        4096000, 7962624, 11239424, 20480000, 23887872, 71663616, 78675968,
        102400000, 214990848

Writing inode tables: (long wait here) done
Creating journal (8192 blocks): done
Writing superblocks and filesystem accounting information: (wait) done

This filesystem will be automatically checked every 37 mounts or
180 days, whichever comes first.  Use tune2fs -c or -i to override.
#
This will also take a decent amount of time, but "only" about 15 minutes in my case. After the filesystem has been created, mount it, and behold its glory:
Filesystem            Size  Used Avail Use% Mounted on
...
/dev/md0              1.1T   33M  1.1T   1% /mnt/array
The reason df -h "only" shows 1.1T is that it acually means 1.1TiB, which would be 1.2TB, roughly.
| Benchmarks, Pictures,
and Final Notes or, Eye Candy |
Here are some statistics from Bonnie, comparing the terabyte array and the boot disk. All operations except char and block output (write to disk) are higher, and in particular, block input (read from disk) is over twice as fast!
| Sequential Output | Sequential Input | Random Seeks |
|||||||||||
|---|---|---|---|---|---|---|---|---|---|---|---|---|---|
| Per Char | Block | Rewrite | Per Char | Block | |||||||||
| Machine | MB | K/sec | %CPU | K/sec | %CPU | K/sec | %CPU | K/sec | %CPU | K/sec | %CPU | /sec | %CPU |
| Array | 1536 | 14587 | 43.4 | 20132 | 7.8 | 9671 | 12.2 | 16971 | 49.2 | 36783 | 11.0 | 274.5 | 1.0 |
| Boot Disk | 1536 | 18138 | 54.6 | 24779 | 10.9 | 7235 | 2.7 | 12168 | 34.0 | 17504 | 3.2 | 161.7 | 0.4 |
Click any picture to bring up a larger version:
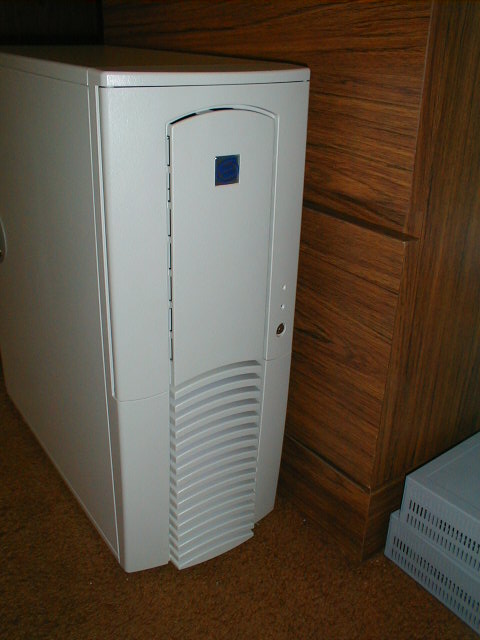
|
The front of the case is unimposing. You would never know that inside is 1.6TB of raw storage space... |
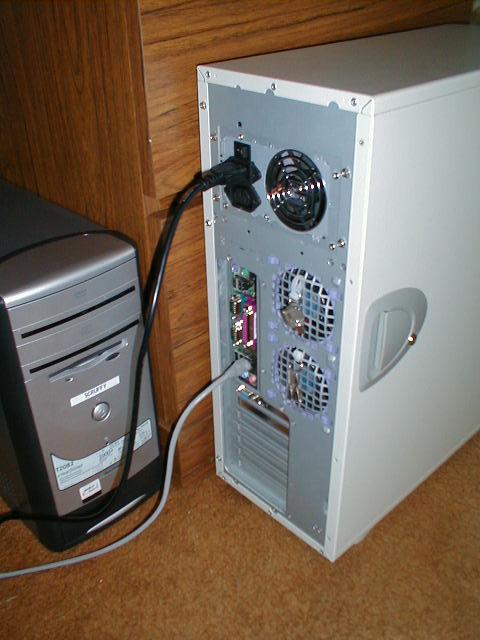
|
And the back. The server is currently running headless. And yes, the motherboard faceplate was lost sometime after I bought it. |
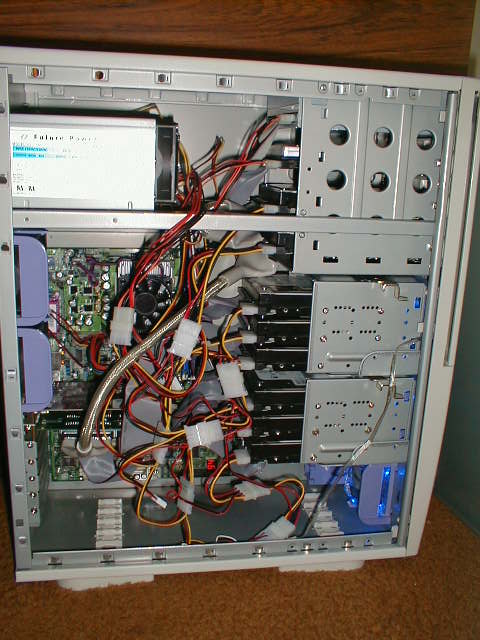
|
Inside the case is a different story. |
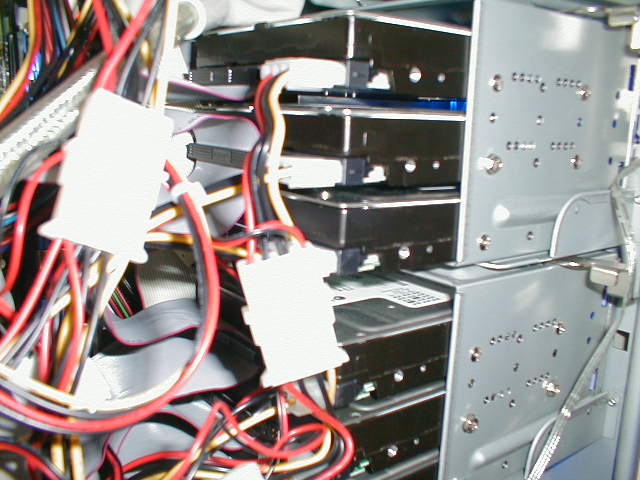
|
At the bottom are 2 HDD sleds, each with 3 200GB Wester Digital drives. To keep them cool, a fan is mounted in front of each sled. |
|
The top 4 5.25" bays contain, from top to bottom, a DVD-ROM drive, the 13GB boot drive, and 2 200GB Western Digital drives. |
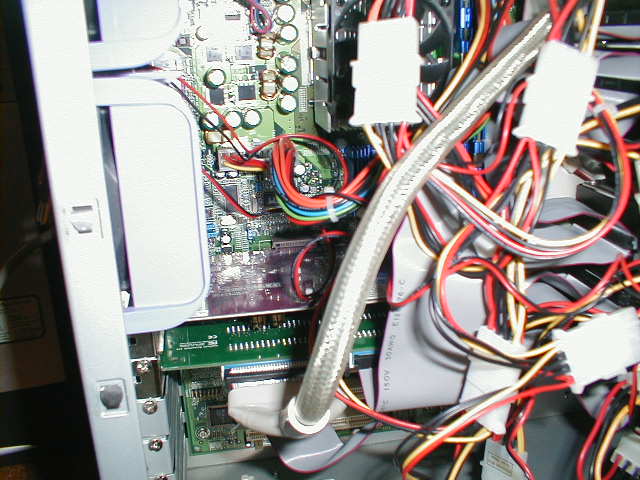
|
There are 2 cards plugged in: some budget AGP card (as the motherboard I bought does not have built-in video), and the HighPoint RAID card. The cabling isn't as neat as I would have liked it to be, but it works. |
Some final thoughts: